Step-by-Step Guide: Launching Your First Linux VM on Google Cloud Platform (GCP)
With additional step about Deleting a VM on Google Cloud Platform (GCP).

I am an electrical engineer with a passion for DevOps and Cloud Engineering, I bring a unique perspective to the world of technology. My expertise includes a wide range of skills including DevOps methodologies, AWS Cloud, Jenkins, CI/CD, MAVEN, Linux, Shell Scripting, Python, YAML scripts, Groovy Scripts, Assembly language, Ansible, Docker, Kubernetes, Grafana, Tomcat, GitHub, Git, Docker Swarm, Terraform IaC, Cloud Engineering, and Networking. With a deep understanding of these technologies, I am able to design and implement complex systems that are both efficient and scalable. Whether working with large-scale enterprise systems or small startups, I am dedicated to delivering innovative solutions that drive success.
Introduction
Google Cloud Platform (GCP) provides a powerful infrastructure for running applications and storing data in the cloud. In this detailed step-by-step guide, I will walk you through the process of launching your first virtual machine (VM) with a Linux operating system on GCP. By following these instructions, you'll be able to set up your Linux VM and start harnessing the capabilities of GCP.
Steps
Step 1: Create a GCP Account:
Visit the GCP website (https://cloud.google.com/) and sign up for a GCP account if you haven't already using your usual Google account/Gmail account.
Follow the instructions to create your account, provide the necessary information and agree to the terms of service.
Set up billing information to enable GCP services. You will be eligible for a free trial with initial 300 credits to explore GCP and Activate them.
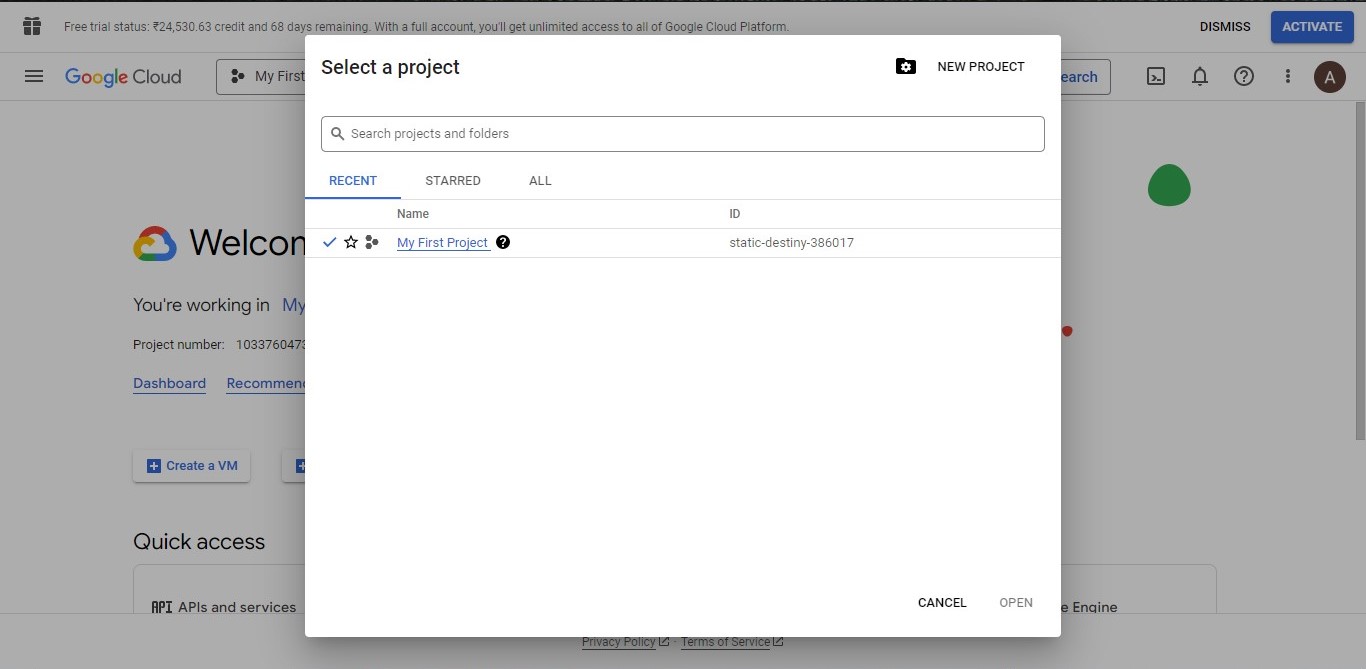
Step 2: Set Up a New Project:
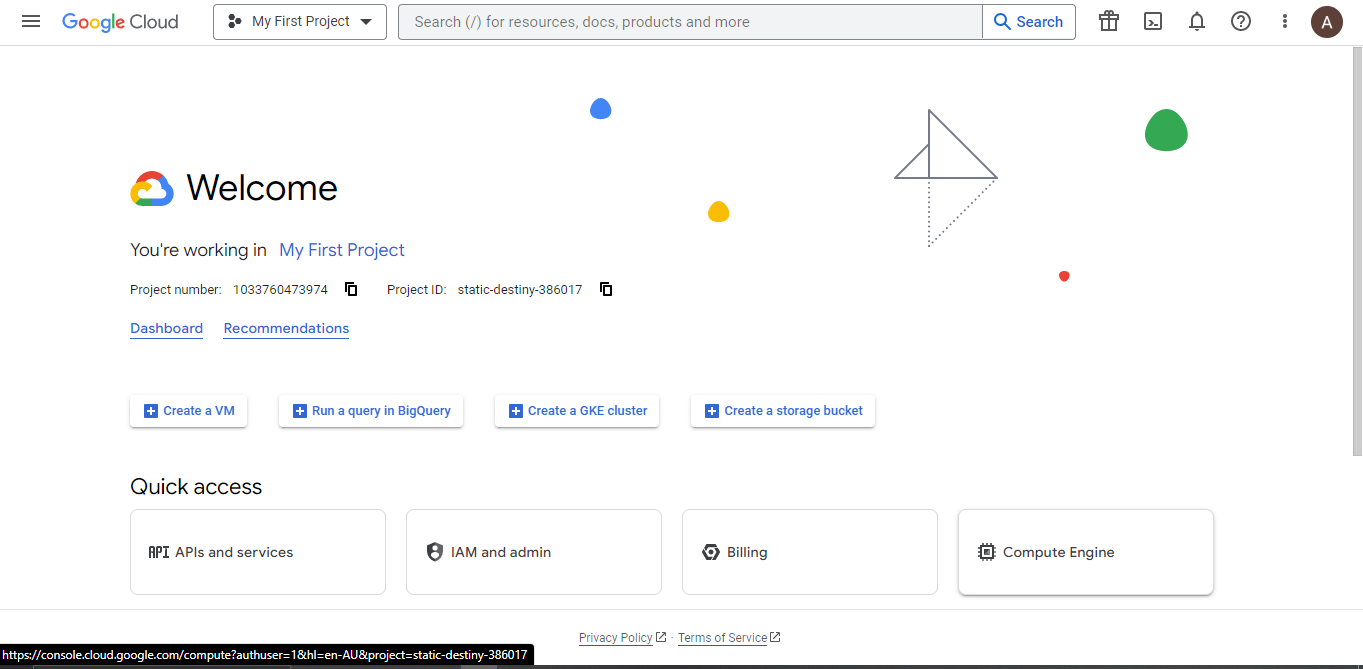
After creating your GCP account, go to the GCP Console (https://console.cloud.google.com/).
In the top navigation bar, click on the project drop-down and select "New Project."
Enter a name for your project and click "Create."
Select the desired billing account and associated resources for your project.
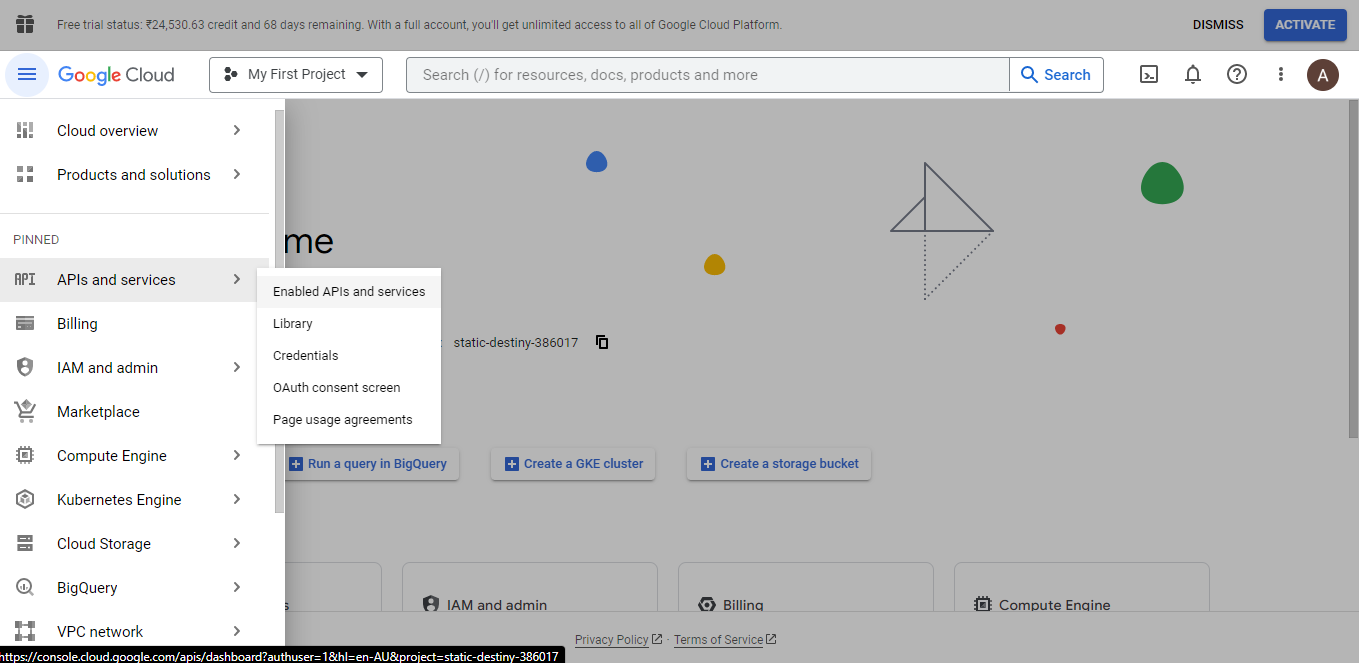
Step 3: Enable Compute Engine API:
In the GCP Console, click on the project drop-down and select "APIs & Services" > "Library."
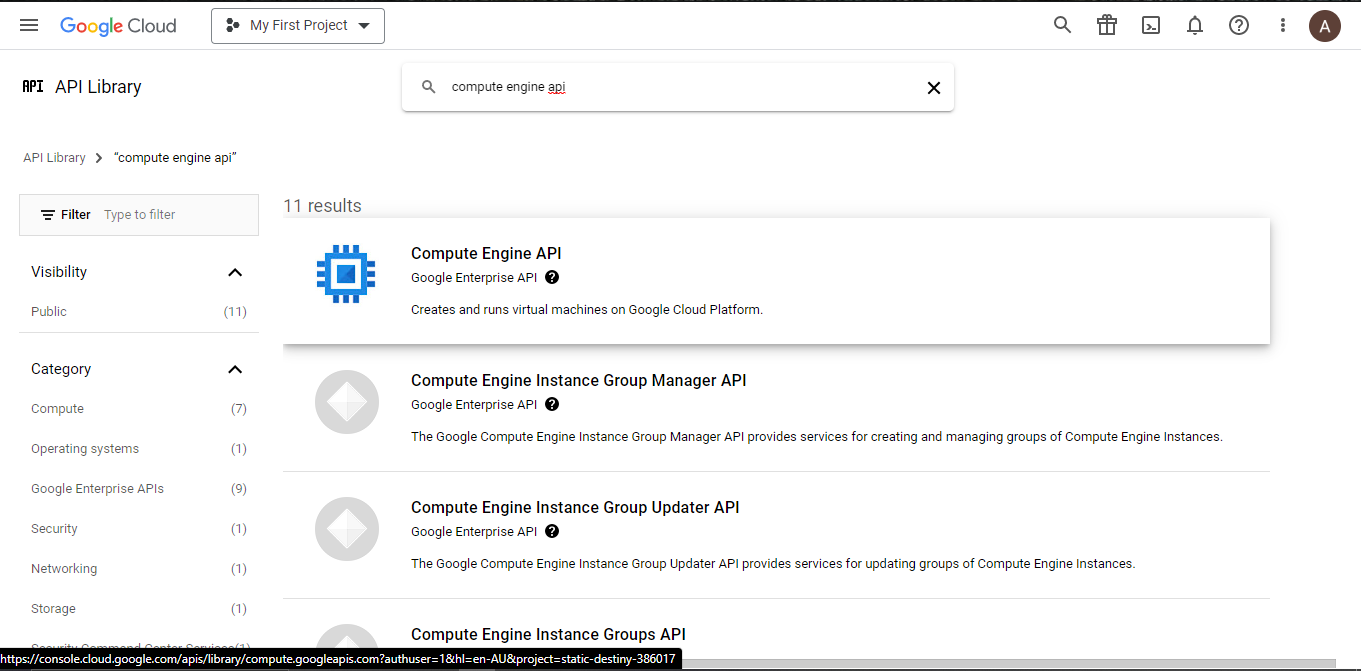
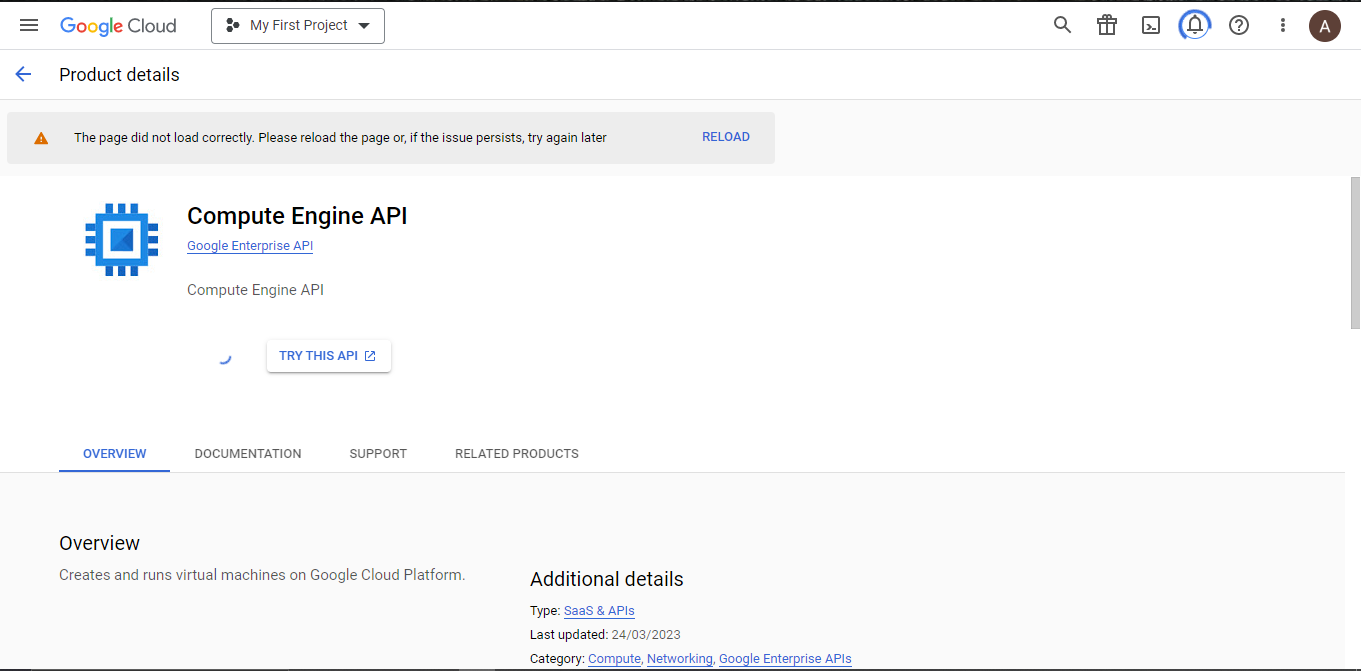
Use the search bar to find "Compute Engine API" and click on it.
Click the "Enable" button to enable the Compute Engine API for your project.
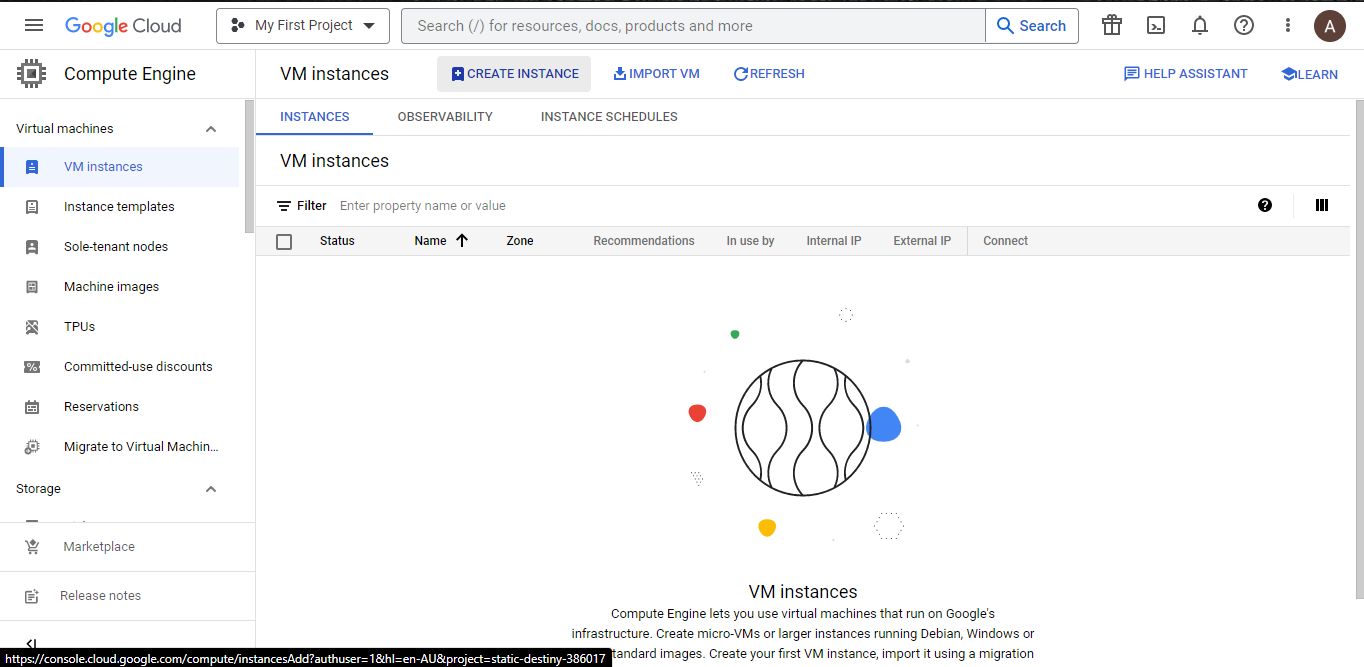
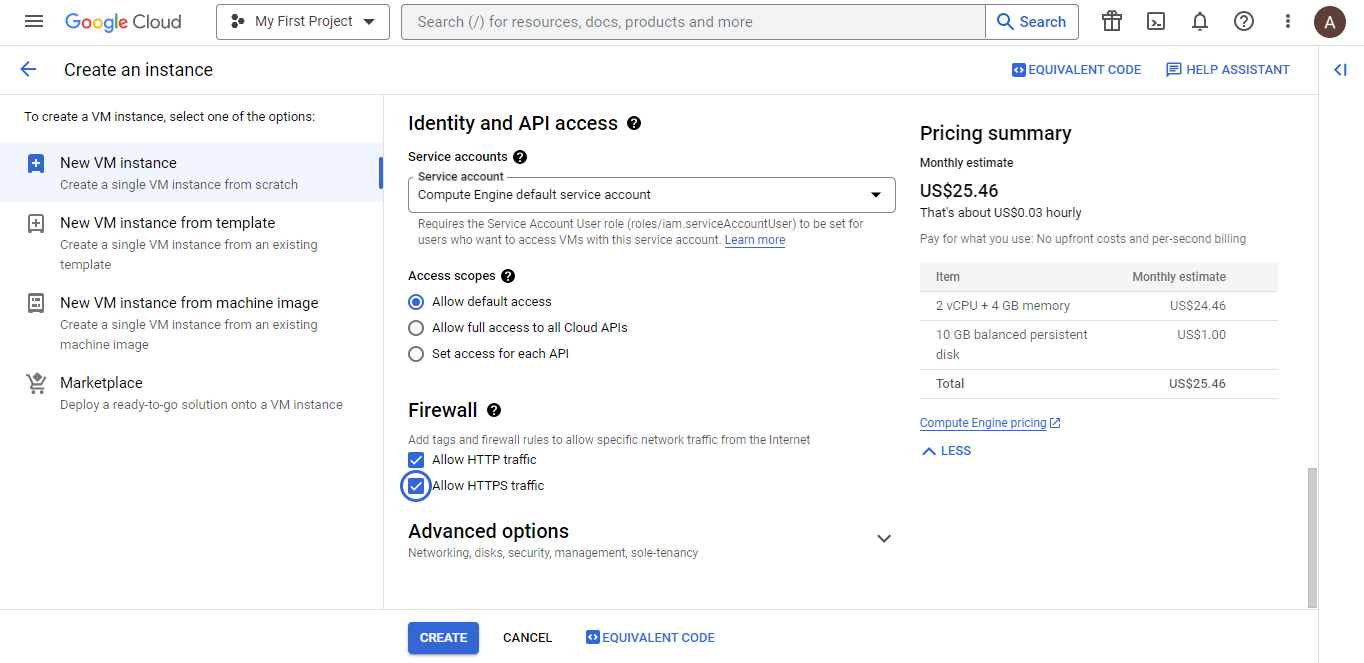
Step 4: Create a VM Instance:
Navigate to the Compute Engine section in the GCP Console.
Click on the "Create Instance" button to start configuring your VM instance.
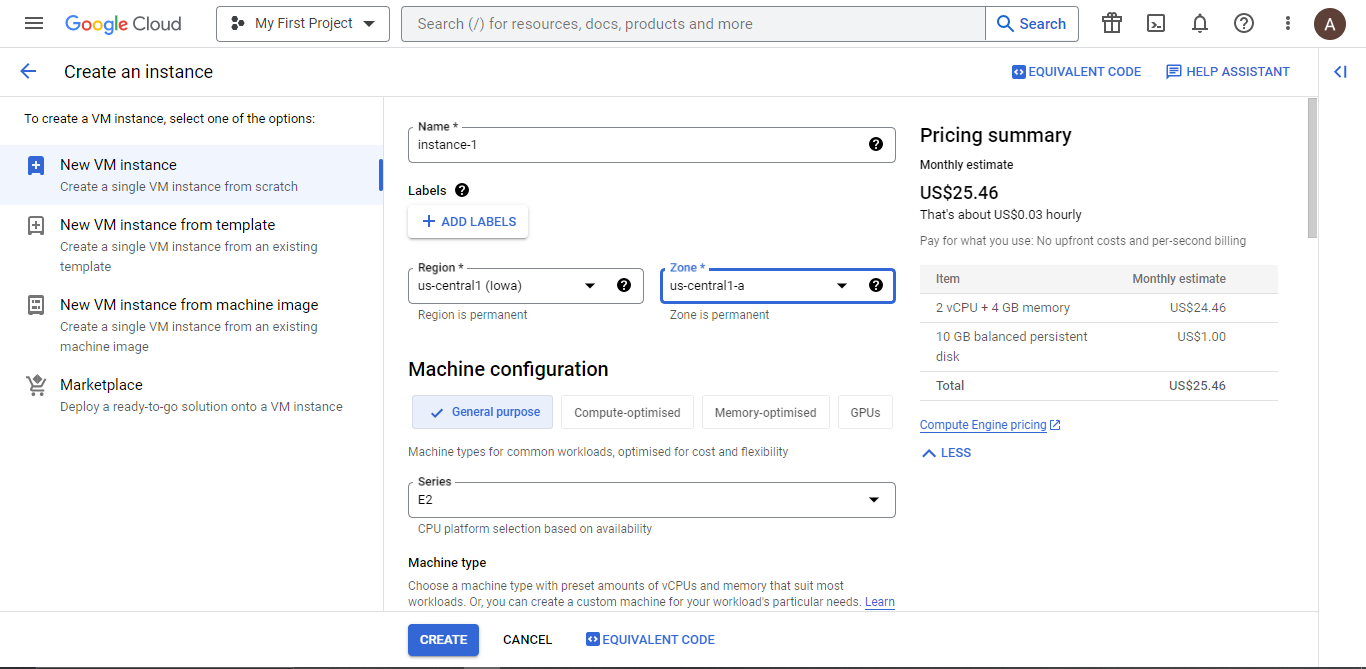
Provide a name for your instance.
Choose the desired region and zone for your VM based on your requirements (e.g., us-central1 and us-central1-a).
Select the machine type that suits your needs. The default should work for most use cases.
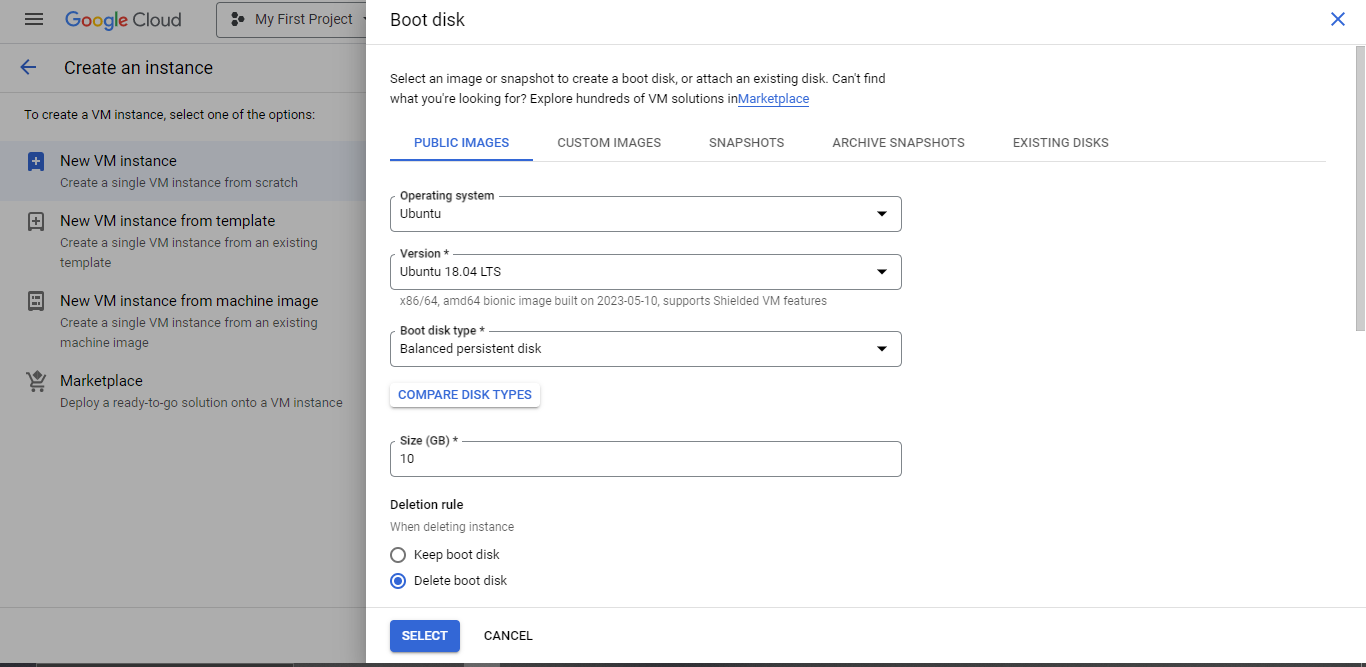
Under "Boot Disk," click on "Change" to select the Linux distribution you want to use. Choose an image from the list, such as "Ubuntu" or "Debian."
Set the desired boot disk size, keeping in mind the storage requirements of your applications.
Configure the firewall settings by selecting "Allow HTTP traffic" or any other ports you need to open.
Click on "Create" to create your VM instance.
Step 5: Connect to the Linux VM:
Once the VM is created, you can connect to it using SSH.
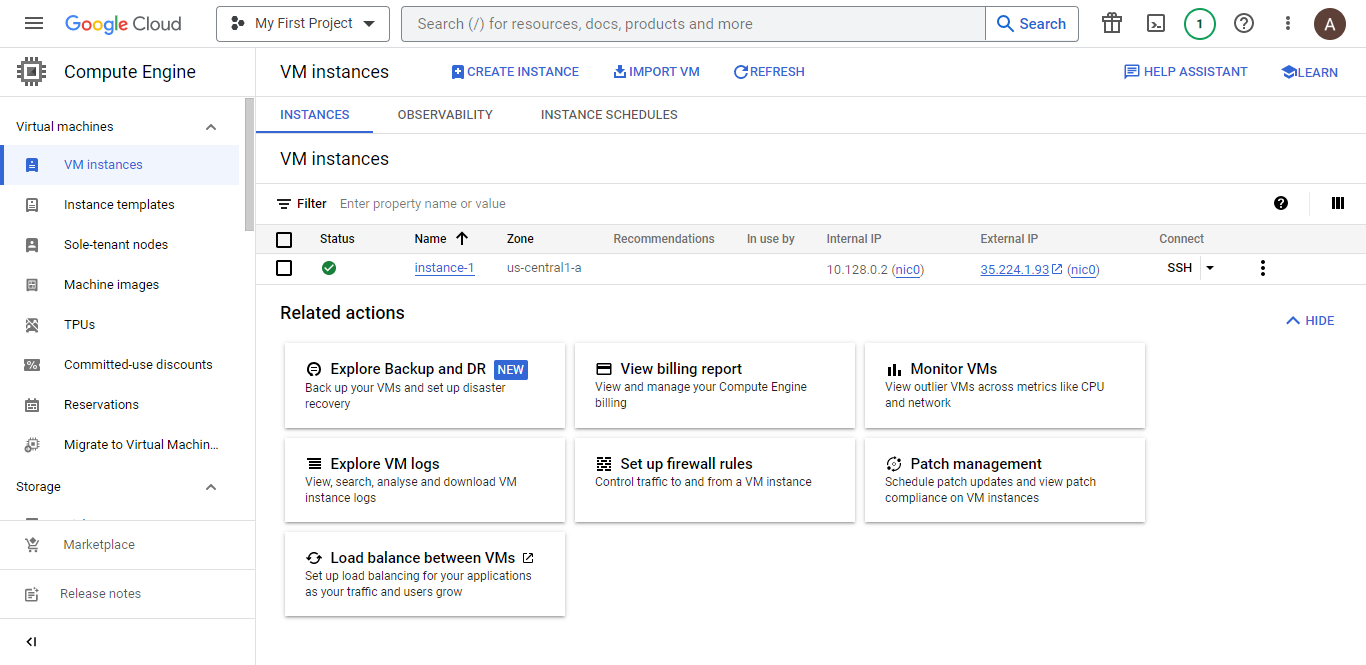
In the VM instances list in the GCP Console, click on the
SSHbutton next to your VM instance.A terminal window will open, allowing you to interact with your Linux VM.
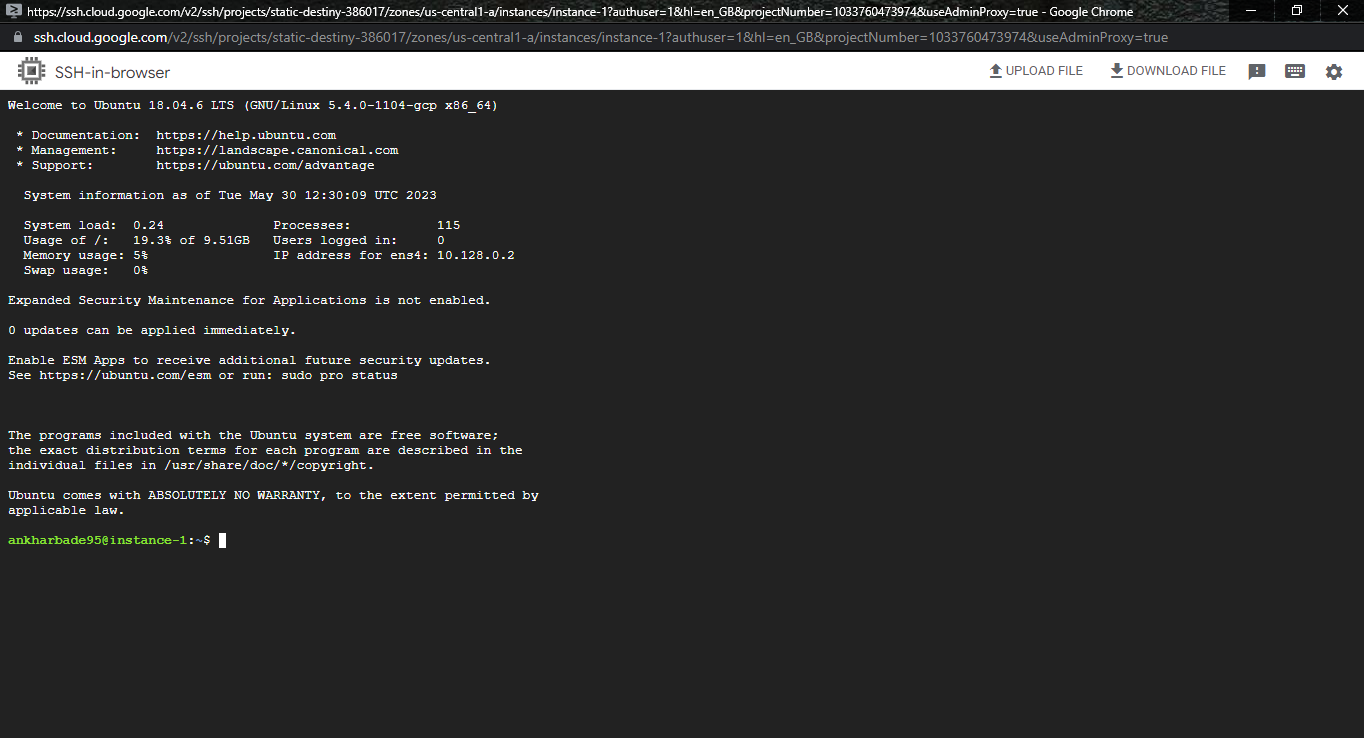
Step 6: Explore and Customize Your Linux VM:
You are now connected to your Linux VM on GCP. You can install additional software, configure services, and perform any necessary setup based on your requirements.
Use the package manager of your Linux distribution (e.g., apt-get for Ubuntu) to install applications and libraries.
Configure your Linux VM to meet your specific needs, such as setting up user accounts, enabling security features, or installing additional software packages.
Step 7: Deleting a VM on Google Cloud Platform (GCP):
When you no longer need a VM on GCP, Follow these steps to delete a VM on GCP:
In the VM instances list, locate the VM instance you want to delete.
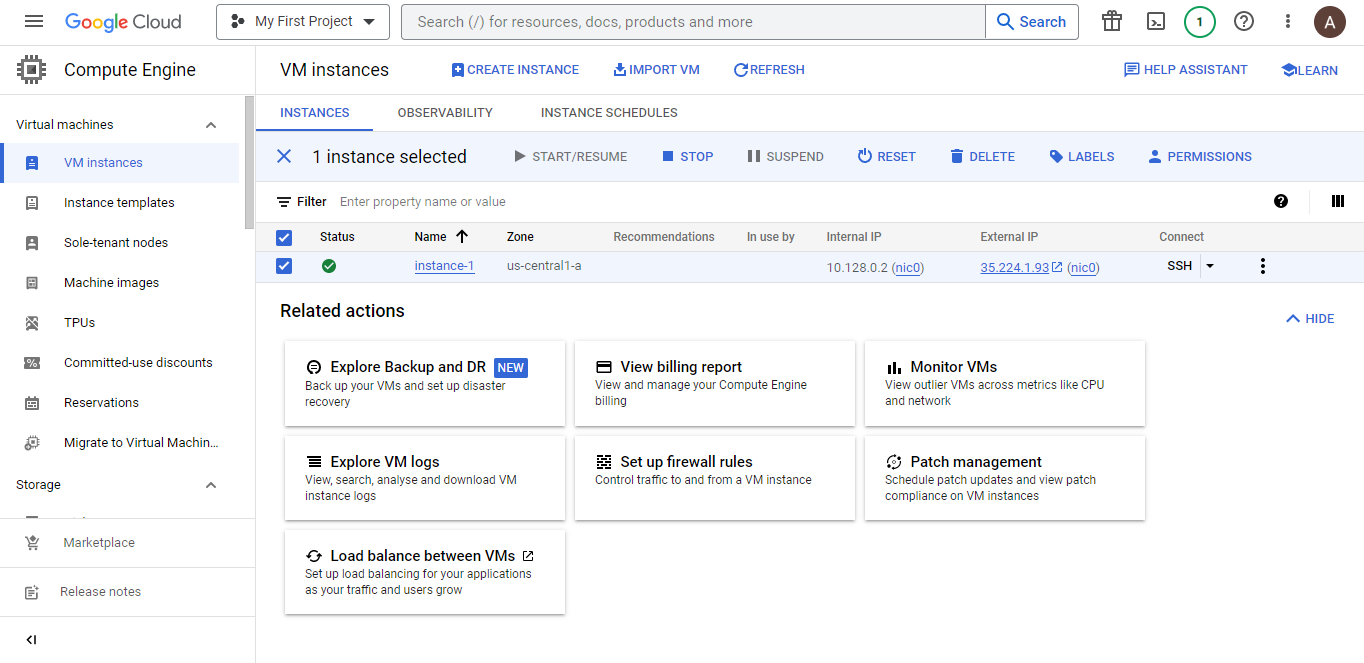
Check the box
☒next to the VM instance select it.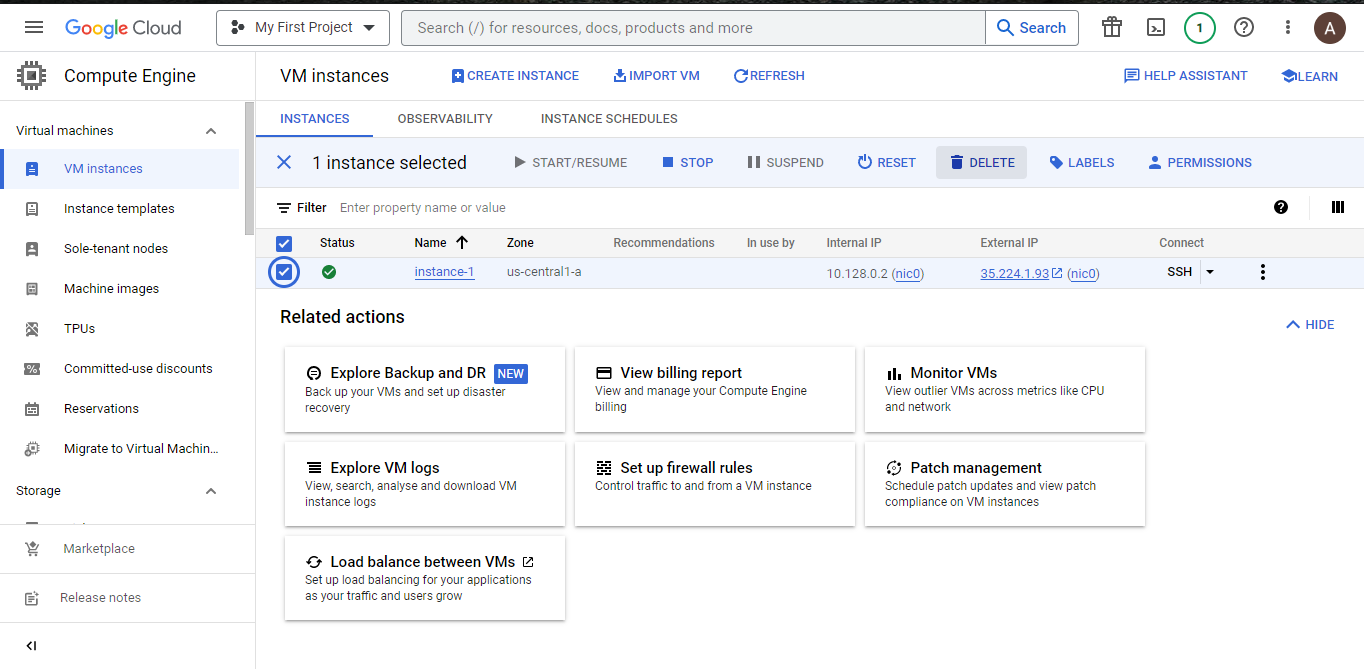
Click on the "
Delete" button at the top of the page.A confirmation dialog box will appear, providing information about the resources that will be deleted along with the VM instance. Review the information to ensure you're deleting the correct VM instance.
If you have any associated disks with the VM instance, you'll have the option to choose whether to keep or delete them. Make the appropriate selection based on your requirements.
Click on the "
Delete" button to initiate the deletion process.GCP will begin deleting the VM instance and any associated resources. The process may take a few moments to complete.
Once the deletion is finished, the VM instance will be removed from your GCP project, and any associated resources will be released.
Conclusion
By following this step-by-step guide, you have successfully launched your first Linux virtual machine on the Google Cloud Platform (GCP). You can now explore the extensive capabilities of GCP, leverage the scalability and reliability of the cloud, and start building and deploying your applications with ease. Enjoy harnessing the power of GCP for your Linux-based projects!
Please share your thoughts and opinions on this topic in the comments section below.
The above information is up to my understanding and learning experience. Suggestions are always welcome.
~Abhiraj kharbade
#DevOps #GCP #Computeengine
Connect with me :


